Setting up SAML SSO with Okta
Follow these steps to configure Okta as your SAML identity provider for Atticus.
Create new Okta Application
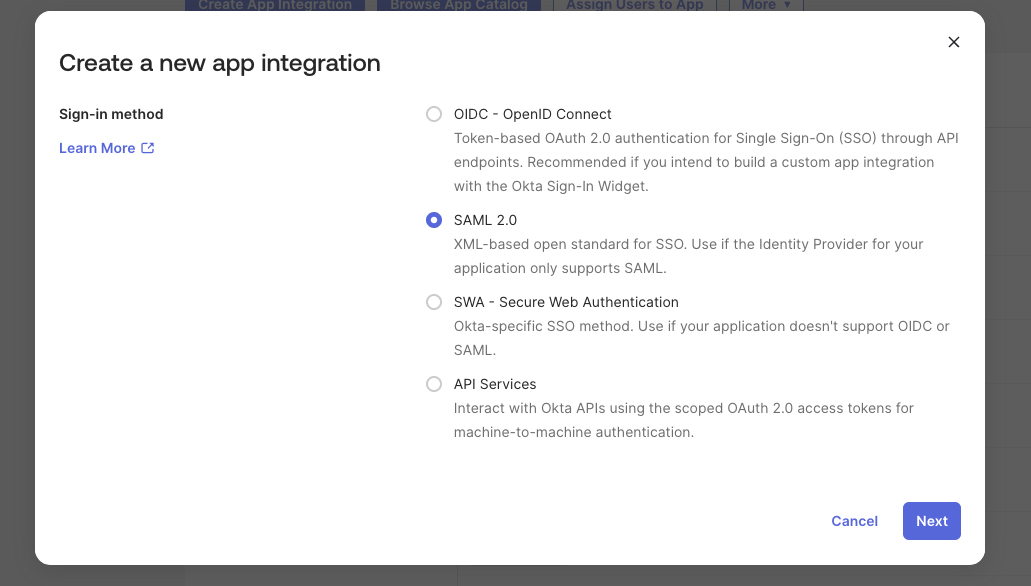
Begin by logging into your Okta Admin Console. Once you're logged in, navigate to Applications → Applications in the left-hand menu. From there, click the Create App Integration button to start the setup process. When prompted to choose a sign-on method, select SAML 2.0 and click Next to continue.
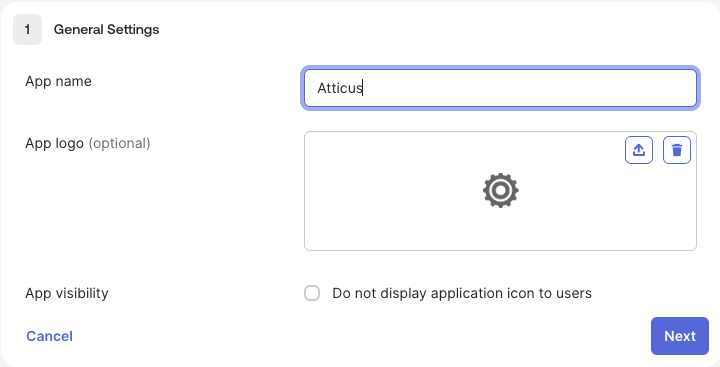
Enter an App name such as "Atticus" to identify the application in your Okta dashboard, then click Next to proceed to the SAML configuration.
Configure SAML Settings
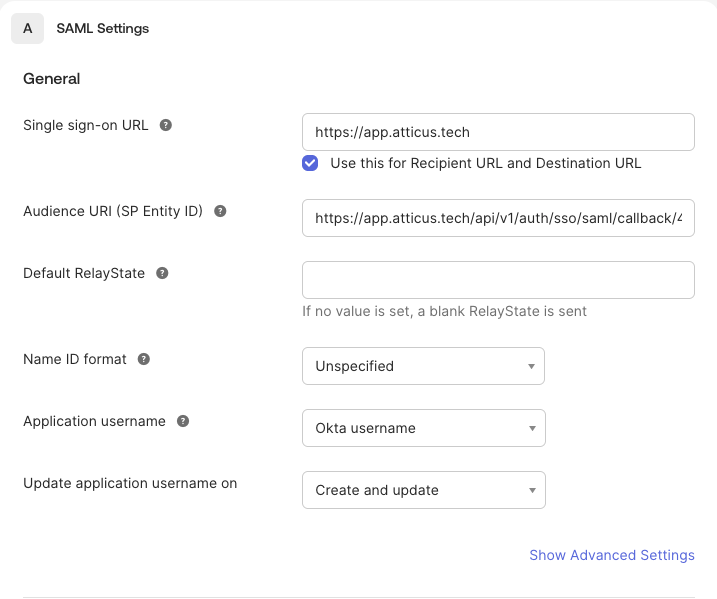
On the SAML Settings page, you'll need to enter the connection details provided by Atticus.
For Single sign-on URL, enter the Reply/ACS URL provided by Atticus (e.g., https://app.atticus.tech/api/v1/auth/sso/saml/callback/4aedd0de-48ce-4c70-9d11-2c7156e6df80). Make sure the checkbox Use this for Recipient URL and Destination URL is checked.
For Audience URI (SP Entity ID), enter the Entity ID (e.g., https://app.atticus.tech).
For Name ID format, select Persistent. For Application username, set it to Custom and use user.getInternalProperty("id"). This sends Okta's internal user ID as the Name ID, which is a stable, persistent identifier that will never change — even if a user's name or email is updated.
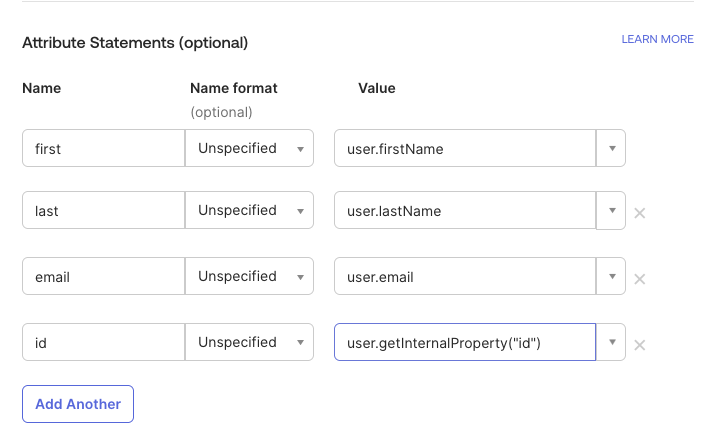
Configure Attribute Statements
Next, you'll configure the user attributes that Okta will send to Atticus during authentication. These attributes allow Atticus to identify and authenticate users properly. Scroll down to the Attribute Statements section.
Add user attributes by clicking Add Another to create new rows, then enter the following attributes. These determine what user information Okta sends to Atticus:
first(user's given name):user.firstNamelast(user's surname):user.lastNameemail(user's email address):user.email
Optional: If you would like to send an Employee ID, Salary ID, or other organisational identifier to Atticus, you can add it as an additional attribute statement. For example:
employeeId(employee identifier):user.employeeNumber
Consult with your Atticus account manager if you would like to include additional identifiers.
Refer to the screenshot below for a complete example of the configured attributes:
After entering all attributes, click Next to continue to the feedback page.
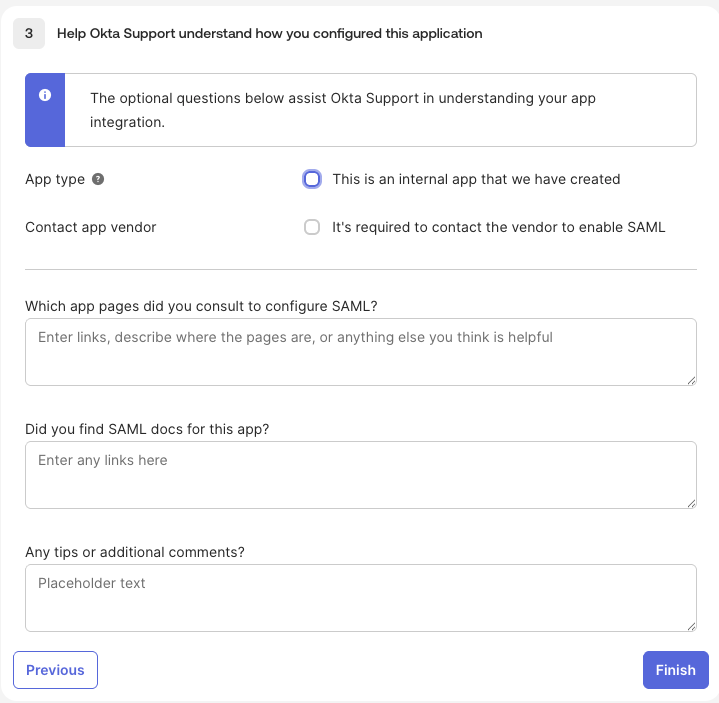
Complete Application Setup
On the Application Feedback page, you can optionally provide information about how you're using the application. This step is not required for the integration to work.
You can leave the fields blank or fill them in based on your preferences, then click Finish to complete the application creation.
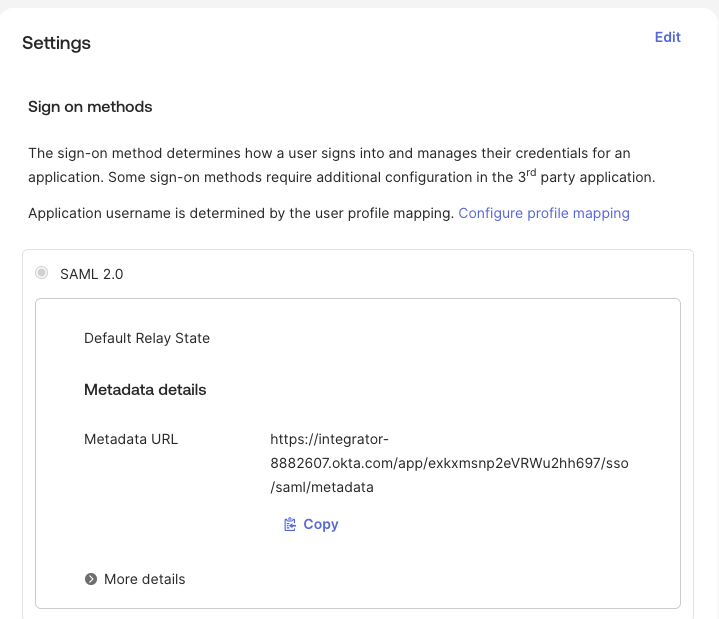
Share Metadata with Atticus
The Okta application for Atticus is now configured! The final step is to provide the SAML metadata to Atticus.
In the Sign On tab of your application, locate the Metadata details section. You'll find a Metadata URL link.
Copy this URL and send it to your Atticus account manager or the Atticus platform team. Alternatively, you can click the URL to view the XML metadata and download it as a file to share.