Setting up SAML SSO with Microsoft Entra
Follow these steps to configure Microsoft Entra as your SAML identity provider for Atticus.
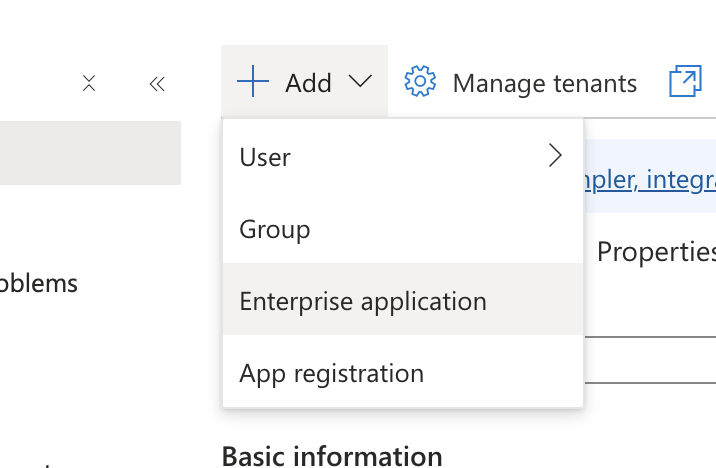
Create a New Enterprise Application
Start by signing in to the Microsoft Entra admin center. Once you're logged in, navigate to Identity → Applications → Enterprise applications.
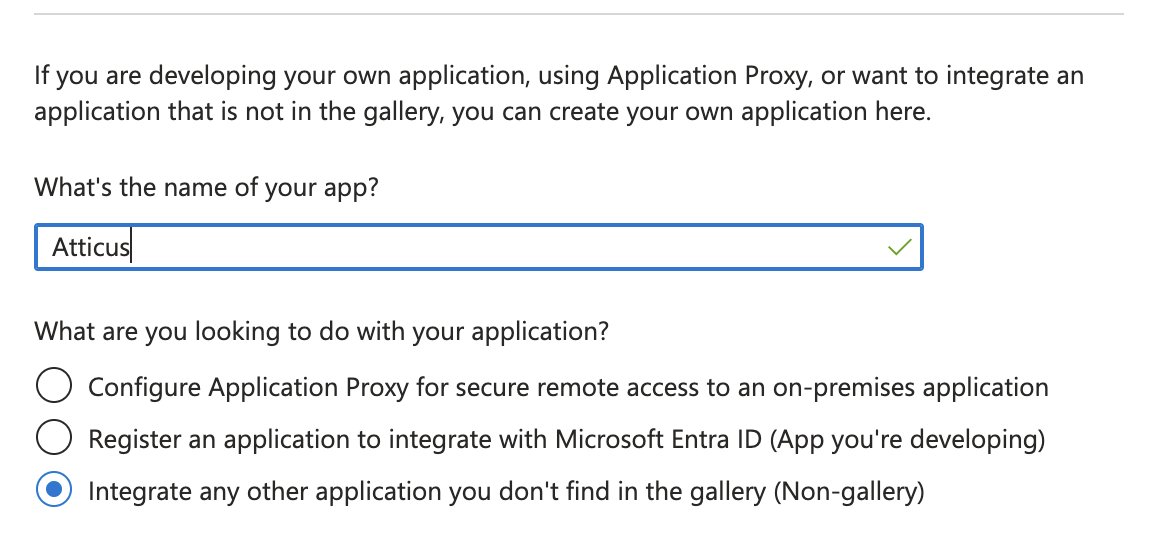
Click the New application button to begin creating a new integration. On the next screen, select Create your own application.
Enter a name for your application (e.g., "Atticus"), and select the option Integrate any other application you don't find in the gallery (Non-gallery). Click Create to finalize the application creation.
Configure SAML-based Sign-on
In your newly created application, navigate to Single sign-on in the left menu.
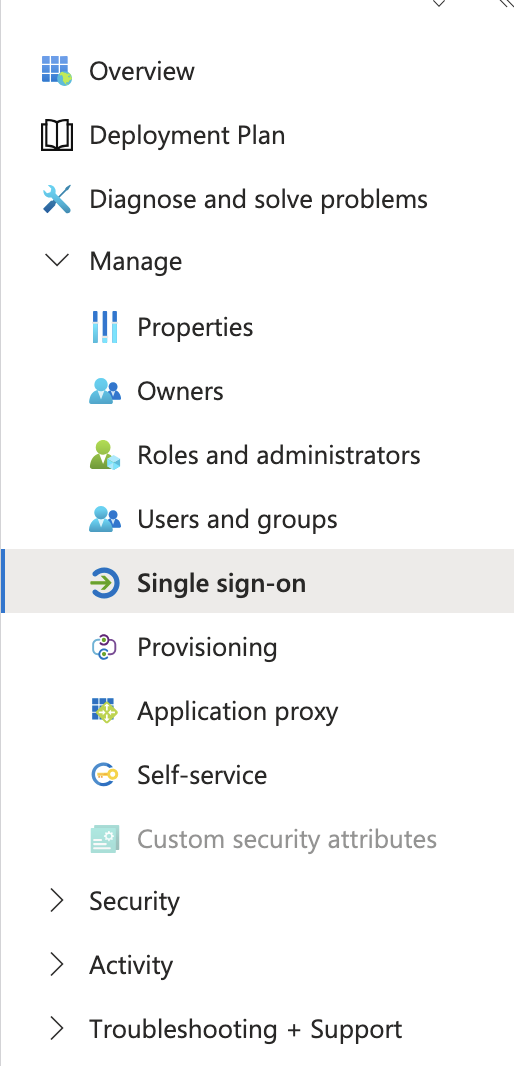
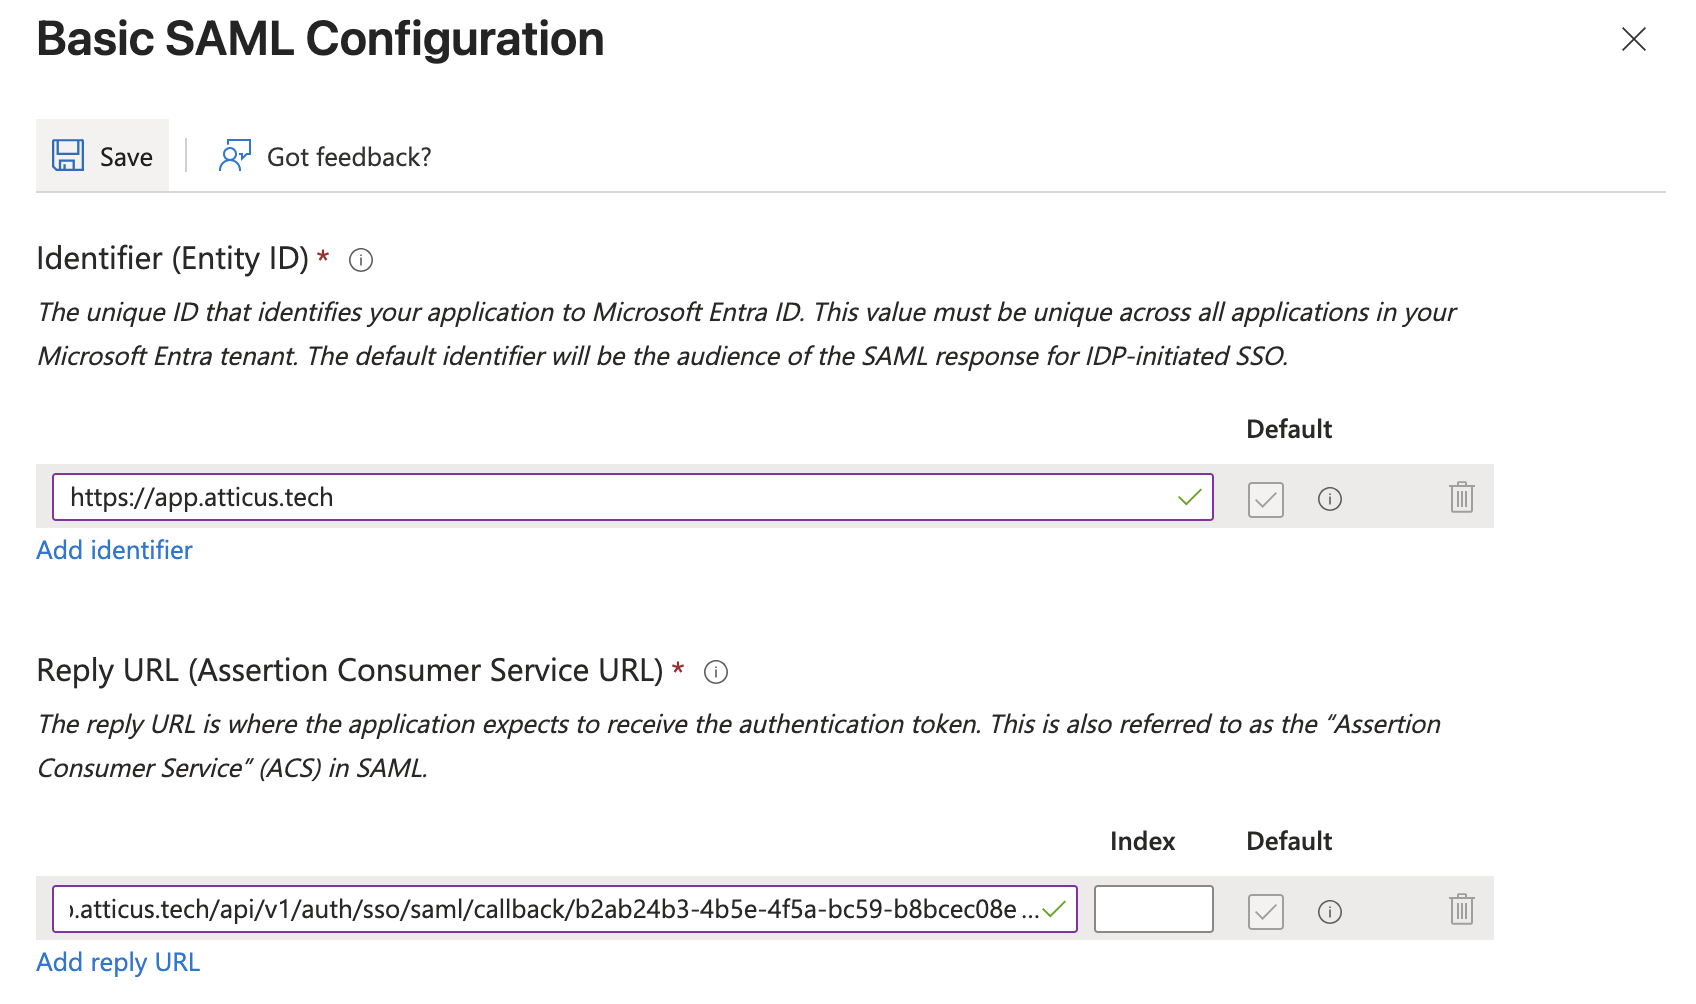
Select SAML as the single sign-on method. In the Basic SAML Configuration section, click Edit to open the configuration panel.
Enter the connection values provided by Atticus below. These values link your identity provider with Atticus — ensure each field matches exactly:
- Identifier (Entity ID): Enter the Entity ID (e.g.,
https://app.atticus.tech) - Reply URL (Assertion Consumer Service URL): Enter the Reply/ACS URL (e.g.,
https://app.atticus.tech/api/v1/auth/sso/saml/callback/4aedd0de-48ce-4c70-9d11-2c7156e6df80)
Click Save to apply your SAML configuration.
Configure Attributes and Claims
Next, you'll need to configure the attributes and claims that will be passed to Atticus during authentication. These determine what user information your identity provider sends to Atticus.
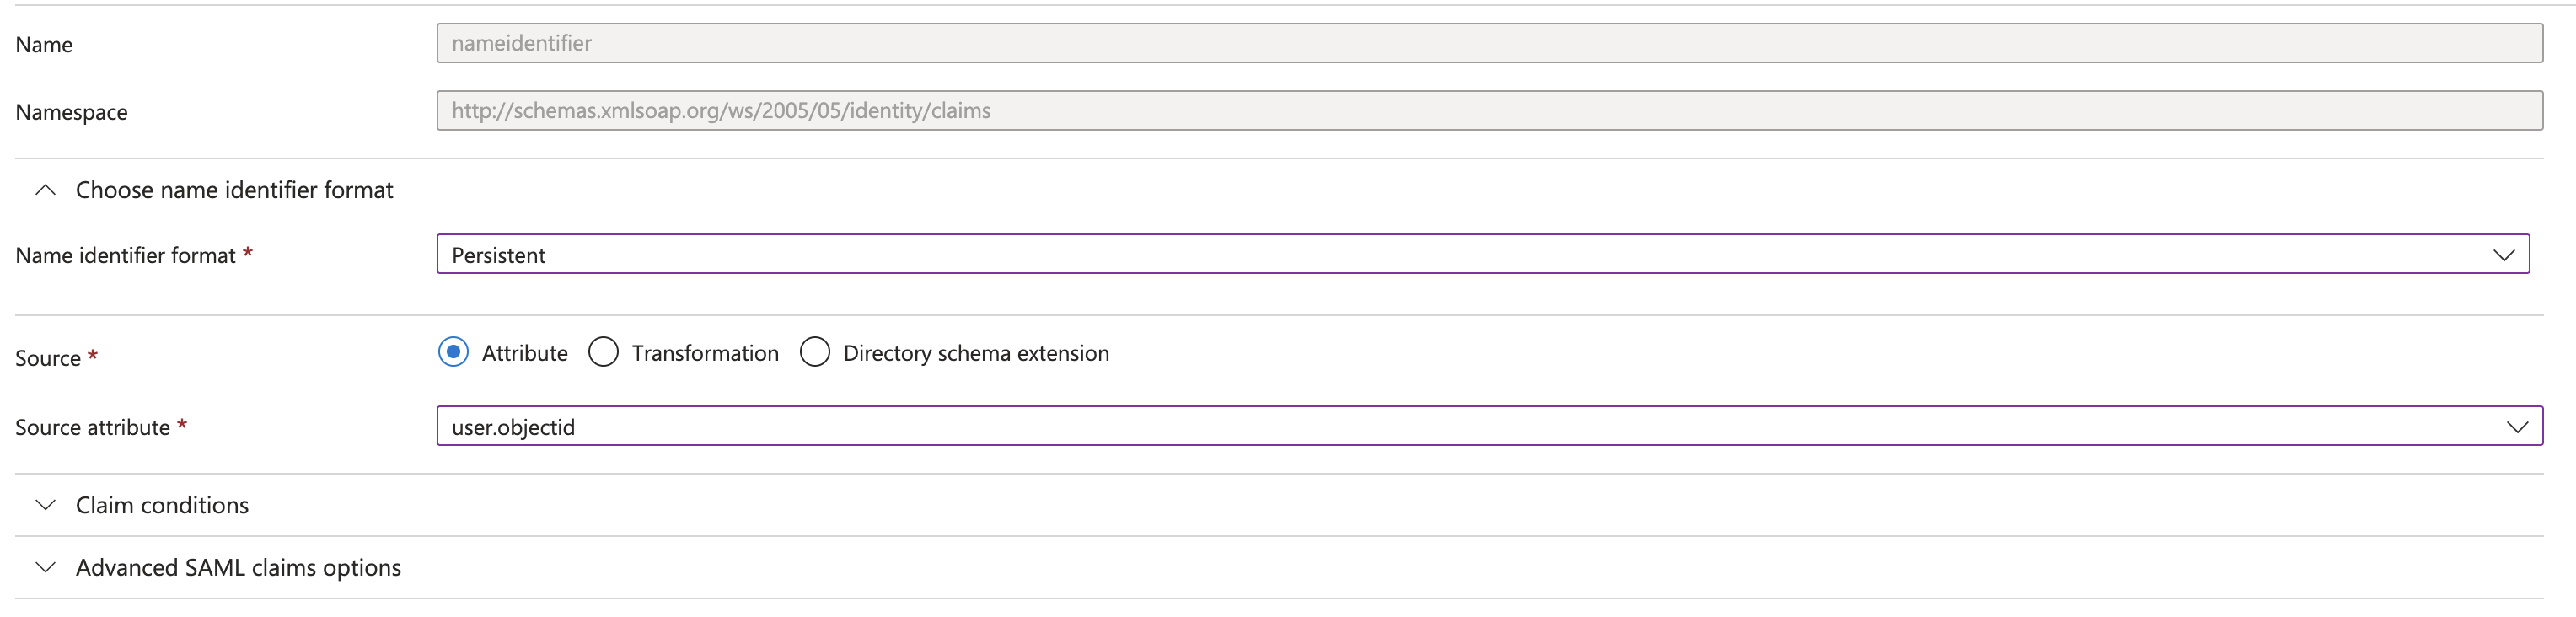
In the Attributes & Claims section, click Edit to open the configuration panel. Modify the Unique User Identifier (Name ID) to use a Persistent format and set the Source Attribute to user.objectid. This sends the Entra Object ID as the Name ID, which is a stable, persistent identifier that will never change — even if a user's name or email is updated.
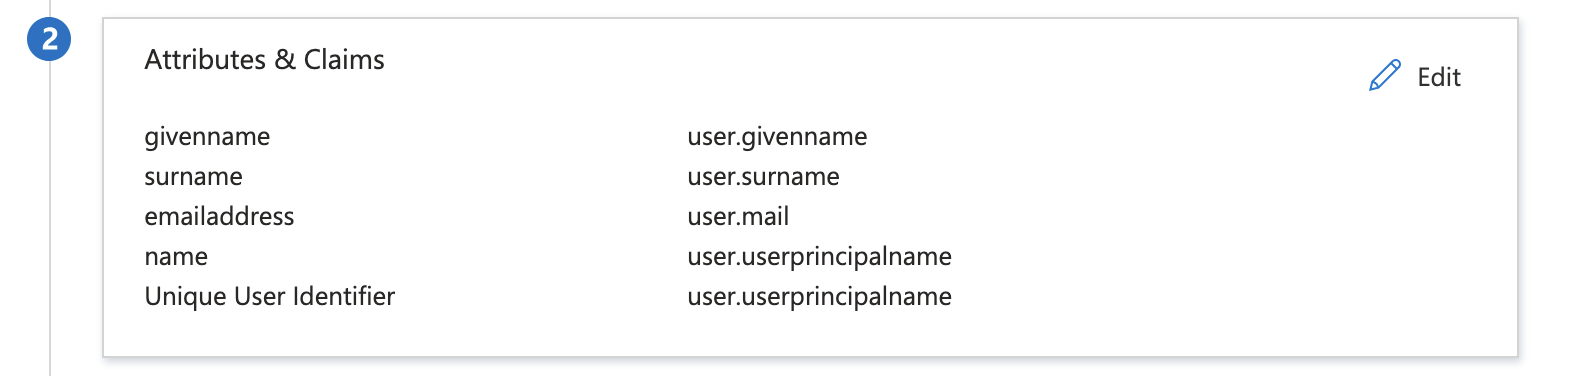
Configure the additional claims as shown:
emailaddress:user.mailgivenname:user.givennamesurname:user.surname
Optional: If you would like to send an Employee ID, Salary ID, or other organisational identifier to Atticus, you can add it as an additional claim. Click Add new claim and configure it, for example:
employeeid:user.employeeid
Consult with your Atticus account manager if you would like to include additional identifiers.
Ensure the Namespace for each Additional Claim is: http://schemas.xmlsoap.org/ws/2005/05/identity/claims. Once you've configured all the necessary claims, click Save to apply your changes.
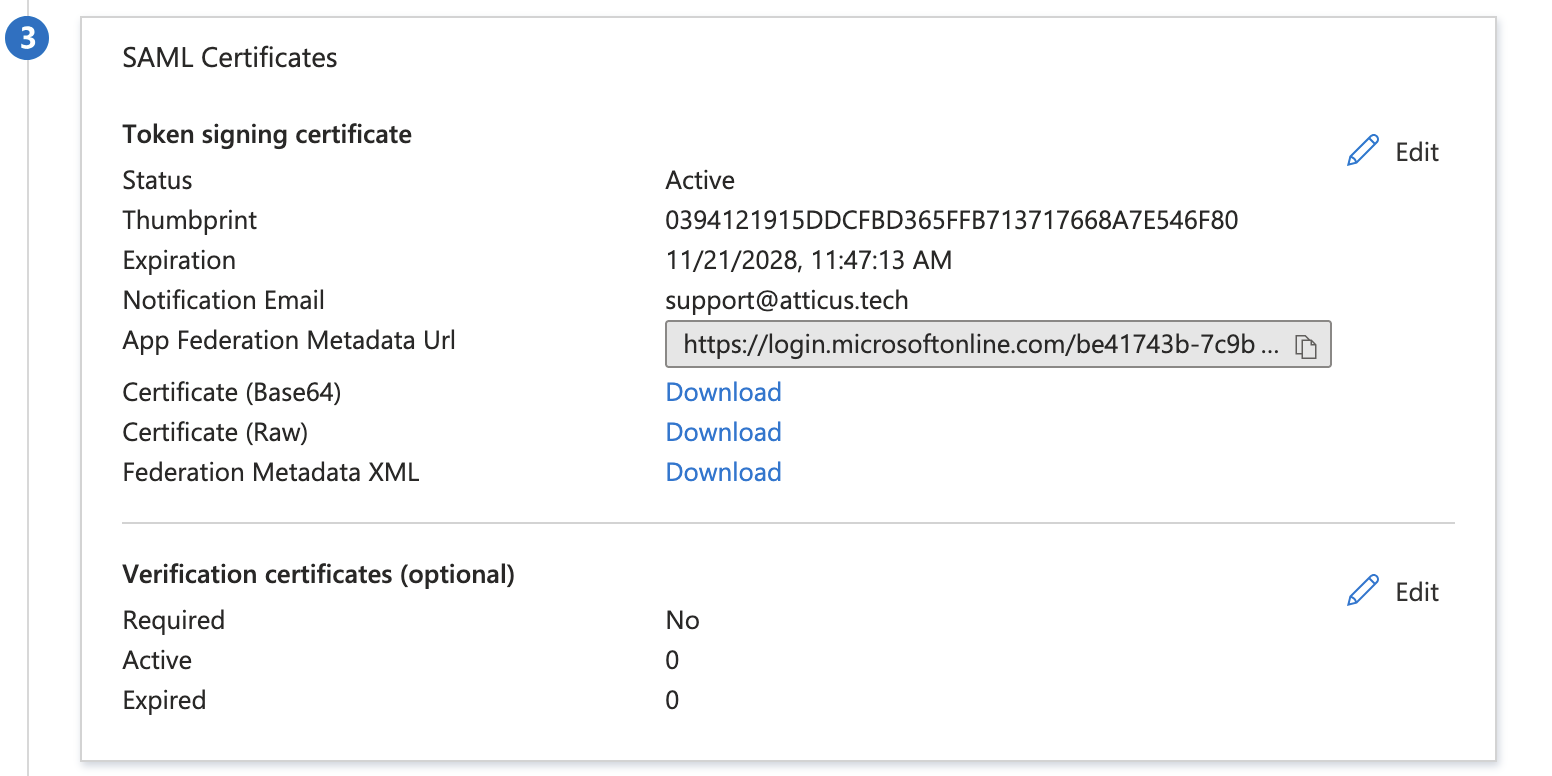
Share Metadata with Atticus
The Entra application for Atticus is now configured! The final step is to provide the SAML metadata to Atticus.
In the SAML Certificates section, locate the Federation Metadata XML entry. Click Download to save the metadata file to your computer.
Once downloaded, provide this metadata file to your Atticus account manager or the Atticus platform team to complete the integration. You can also send the App Federation Metadata Url link.